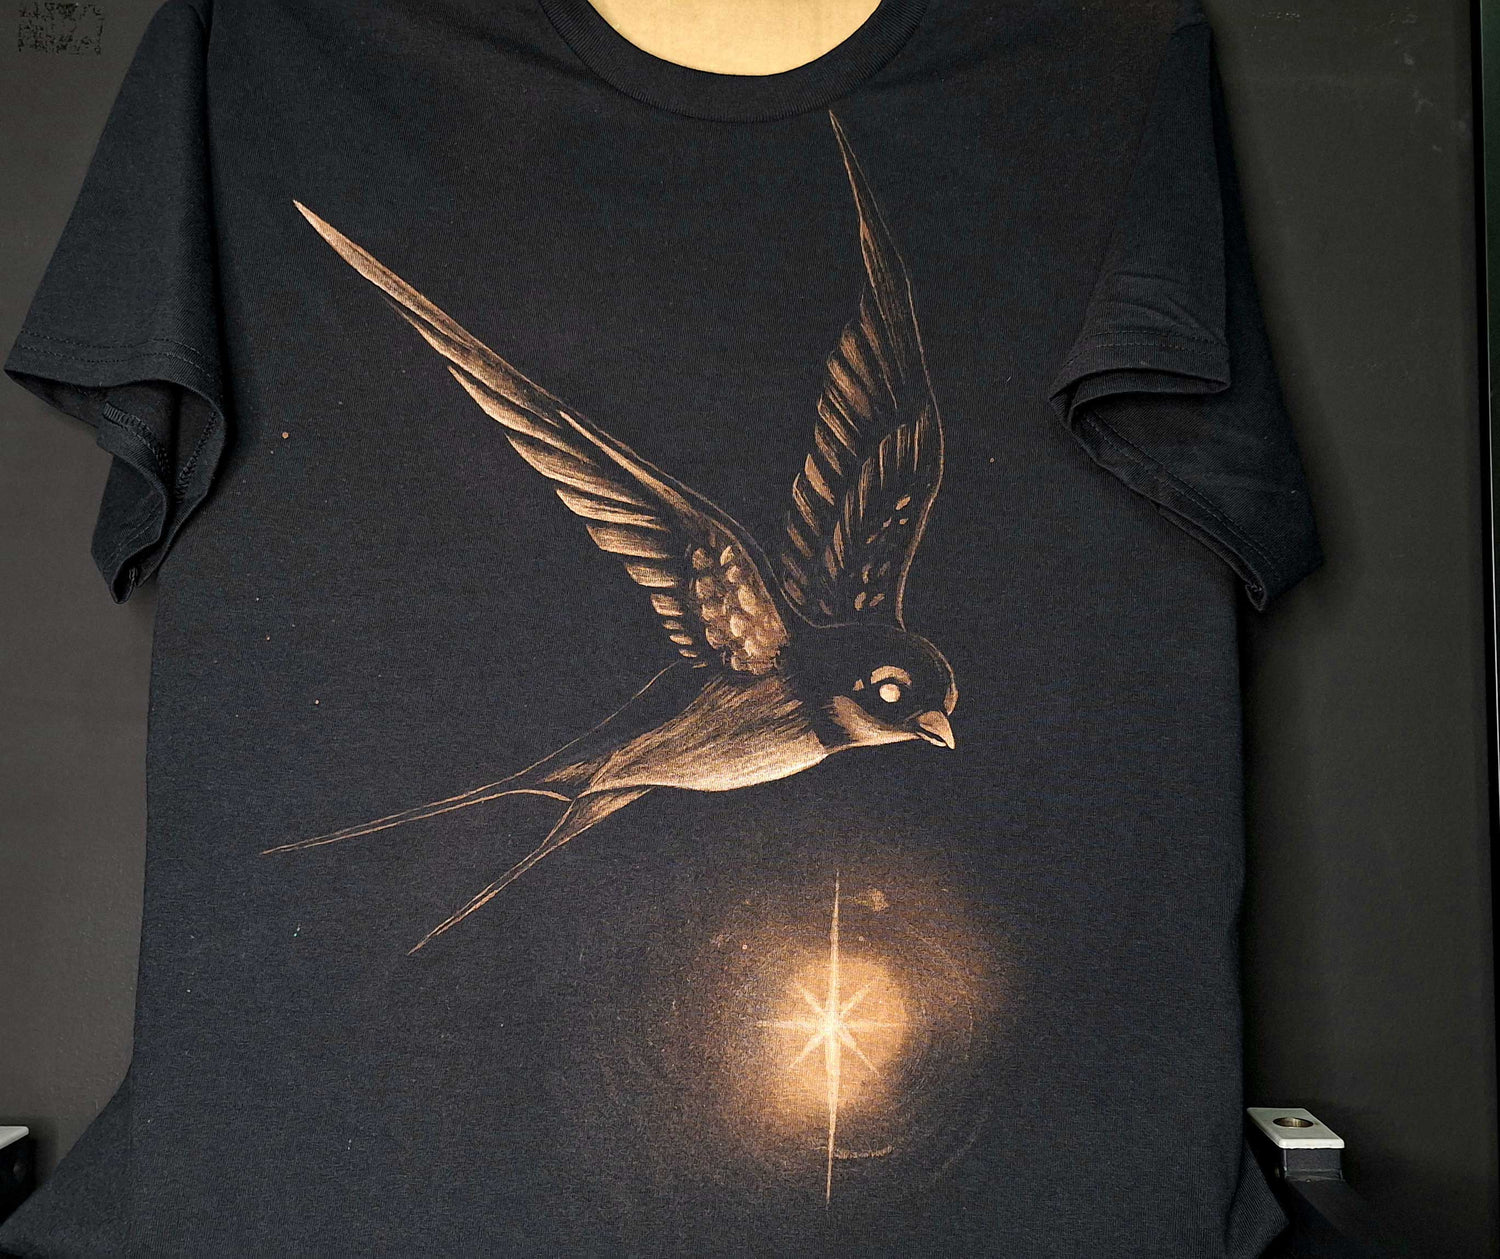

The Bleach Painting Club is your complete guide to mastering the art of painting with bleach on fabric.
Through 31 step-by-step tutorials filled with videos, infographics, and clear instructions, you'll learn everything from creating flawless gradients and crisp lines to advanced techniques like glowing effects and realistic fur textures.
31 bite-size tutorials, just €22(~$25). Paint tonight, wear tomorrow.
30-day money-back, no questions
400+ students • 4.9★ rating
Hear what other students have to say...


Join the Bleach Painting club today
✅ 31 step-by-step tutorials (text + video)
✅ exclusive student Facebook group
✅ 30-day money-back guarantee
Try one project. If you don't see any improvement, email me a photo and I’ll refund every cent.

You'll learn how to create
Flawless gradients
Stop fighting blotchy, uneven fades. My Layering Method is the only system that locks in glass-smooth gradients every single time. It’s my original process—never published, sold, or taught outside this club.

Take your art even further with
Glowing effect
In one quick demo I’ll hand you my secret Glow Formula—the exact recipe that makes bleach paintings pop with a neon, back-lit radiance you can’t get from any other technique. You won’t find this formula on YouTube, Pinterest, or any art-school curriculum.

You'll even learn how to paint
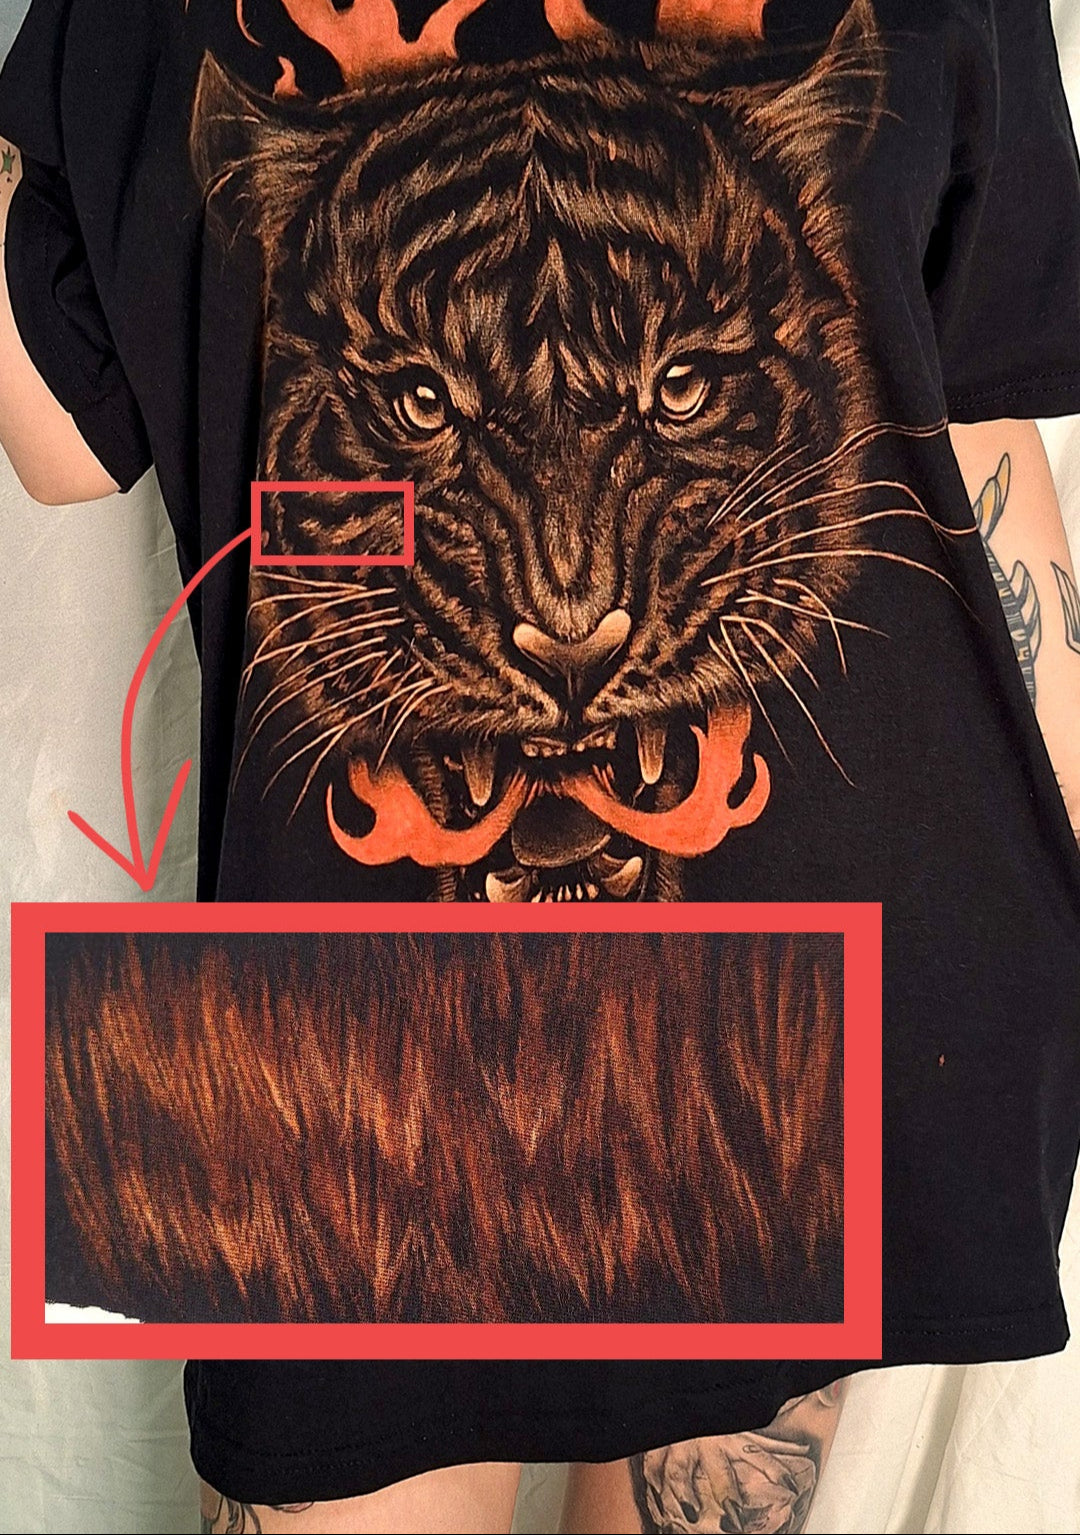
Realistic Fur
Turn scraggly, spaghetti-stripes into velvet-soft fur you can practically pet. My Fur Map breaks every strand into three simple strokes—use it once and friends will swear your next portrait is alive. I’ve never posted this map publicly; it’s locked inside the club
💡 This is for you if…
✅You want to learn bleach painting from scratch with zero previous knowledge.
✅You’ve tried bleach art but can’t get the results you want.
✅You’re looking for creative techniques you won’t find on YouTube.
✅You want clear, step-by-step guidance without hours of pointless talking.
✅You love learning visually with videos, diagrams, and photos—but don’t mind reading clear instructions too.
✅You want professional-level results for just €22 (~$25).
FAQs
Do I need any previous bleach painting experience?
Nope! This course is perfect for total beginners and also packed with advanced tips for experienced artists. I explain every step in clear, simple language and show you exactly how I do it.
What exactly is included in the course?
You get 31 tutorials and exercises covering everything from basic techniques to advanced effects. The lesson contain clear written instructions, helpful infographics, or videos of me painting so you can watch the process in action.
How do I access the tutorials?
Once you purchase, you’ll get instant, lifetime access to all tutorials online. You can learn at your own pace, on any device, anytime you want. All you need to access it is head to the Bleach Painting Club on my website and log in with the same email you used to purchase. There you'll fin all of the tutorials.
Is it safe to paint with bleach?
Yes—when done correctly. I dedicate a full tutorial to bleach safety, including gloves, ventilation, and safe disposal tips, so you can enjoy the process without risks.
What if I’m not good at drawing?
No problem! I teach several ways to transfer designs to fabric, so you can create amazing bleach art even without freehand drawing skills.
What makes this course different from free tutorials online?
Bleach Painting Club is a complete, step-by-step system that covers everything—from the basics to advanced artistry—without gaps. No gatekeeping, no guessing, no hours wasted hunting down scattered information.
I do share a lot of useful tips on my social media but trust me - that's just the tip of the iceberg. In these tutorials I dive in deep.
How are the lessons structured?
The tutorials are a mix of detailed, well-organized text that’s easy to read, paired with pictures and infographics where they help explain the concepts. For techniques that benefit from seeing them in action, I’ve also included process videos of me painting so you can follow along step-by-step
Do I need special materials?
You’ll need fabric (I share the best types), bleach, brushes, and a few common household items to experiment with (but you can also just stick with the brushes).
More about the Bleach Painting Club
Whether you’ve never picked up a brush or you’ve been experimenting for years, this course gives you everything you’ll ever need to know about painting with bleach on fabric—broken into clear, easy-to-follow tutorials packed with videos, infographics, and step-by-step guides.
I’ll show you EXACTLY the techniques I use in my own art—no gatekeeping, no fluff, no filler. You’ll learn how to create crisp lines, soft gradients, dramatic effects, and unique textures—all while avoiding the most common mistakes that ruin bleach art.
What’s Inside the Club
Here are all of the tutorial topics included in the club.
1. The Basics – Learn it Right From the Start
Your foundation for bleach painting mastery: from choosing the right bleach and fabric, to transferring designs, layering for depth, and shading like a pro. These are the skills that make every project easier and more successful.


Clean designs start with a good transfer. Discover four reliable methods to get your artwork onto fabric—whether you’re working freehand, with stencils, or on tricky curved surfaces.

Make your designs last! Learn the exact post-treatment steps—rinsing, neutralizing, and washing—that keep your fabric strong and your bleach art vibrant for years to come.

There’s no one-size-fits-all answer—but I’ll show you how to find the perfect dilution for your fabric, your design, and your bleach strength. Test, tweak, and master your mix.

Bleach is powerful—so safety is non-negotiable. Here’s the gear I recommend (must-haves, smart extras, and comfort add-ons) to keep you safe while you create.


With so many options out there, it’s hard to know what really works. I’ll share the exact shirts, bleach, and brushes I personally use after years of trial and error, so you can skip the frustration and get the right tools from the start.


Bleach is amazing—but it’s not the only option. Explore gentler, safer alternatives like deColourant, Thiox, and even lemon juice, and see how they compare for fabric art.
Clean lines and smooth shading are the backbone of every bleach painting. Because they’re so essential, I decided to go deeper: you’ll not only learn my full techniques in the tutorials, but also get dedicated exercises to practice and lock in these skills. Master these two areas, and every future project becomes easier, sharper, and more polished.

Layering is the secret to smooth gradients and depth in bleach art. This exercise lets you put the theory into practice, gradually building highlights instead of taking out too much color at once. Step by step, you’ll refine your layering technique, achieving cleaner, more controlled results with every attempt.

Crisp, clean lines are the foundation of strong bleach art. This exercise gives you the chance to practice what you’ve learned in the theory, focusing on brush control, dilution, and stroke technique. By repeating these steps, you’ll eliminate blowouts and fuzzy edges, and gain confidence in pulling sharp, even lines every time

Bleach strength and fabric type can make a huge difference in your results. In this exercise, you’ll create your own dilution table to test different ratios and layering effects. Once you have it, you’ll never have to guess again—you’ll know exactly which mix works for your project.
2. Common Errors – Avoid the Art-Killers
Troubleshoot and fix the problems that ruin most bleach paintings—before they happen. You’ll save time, frustration, and fabric by knowing exactly what to do when things go wrong.

Why Your Bleach Isn’t Working
Sometimes bleach just refuses to bleach—it happens more often than you think. From expired bottles to tricky fabrics, I’ll show you the main reasons why and exactly how to fix it.

Why Your Brushes Are Getting Damaged by Bleach
Notice your brushes falling apart after a few uses? Bleach is tough on art tools, but there are ways to make them last longer. I’ll explain what’s happening to your brushes and share my favorite tips for keeping them in shape

Common Mistakes & Creative Fixes
Learn how to avoid the biggest beginner pitfalls and turn any slip-ups into opportunities to elevate your art

Why Your Bleach-Painted Designs Might Be Fading
Your design looked amazing at first, but after a few washes, it’s barely there? Don’t worry, this is a common issue. I’ll show you why bleach fades and what steps you can take to keep your designs vibrant for much longer

Why Neutralizing Matters!
Have you ever heard someone say they didn’t neutralize their bleach-painted shirt and it’s still fine after years? Lucky them—but that’s not how you want to leave your art to chance. Here, I’ll explain why neutralizing is so important and how a simple rinse and peroxide soak can protect your design for the long haul

Why Bleach Eats Through Fabric
Ever finish a design only to find a hole forming in the shirt later? Bleach is powerful, and if handled wrong it can eat through fabric. I’ll explain why this happens and what you can do to protect your clothes while still getting bold results
3. Fun Experiments – Play, Explore, Create
Push bleach painting beyond the basics with playful, unexpected techniques. Perfect for building confidence, sparking ideas, and finding your personal style.

Bleach Painting with a Stencil
Want bold designs without worrying about drawing skills? This exercise shows you how to cut a simple stencil from a plastic sleeve and use bleach to spray or brush a crisp, repeatable design. It’s an easy, low-pressure way to get striking results you can reuse again and again.

This One’s All Toothpick
Put the brushes away—it’s time to see what a toothpick can do. This exercise is all about fine dots, sketch-like strokes, and rough textures that feel spontaneous and hand-drawn. You’ll be surprised how much detail and character you can get from such a simple tool.

Embrace the Imperfect Line (A Woodcut-Inspired Bleach Study)
Not every line needs to be perfect—sometimes beauty is in the rough edges. In this exercise, you’ll explore woodcut-inspired, textured lines and uneven shading that bring raw energy to your art. Let go of perfection and see how imperfection can feel alive

Experimenting with Different Bleach Painting Tools
Bleach painting isn’t just about brushes—anything can become a tool! In this exercise, you’ll test toothpicks, q-tips, spray bottles, sponges, and more to discover new textures and effects. The goal is to experiment freely and see what surprising marks you can create
4. Deepening the Knowledge – Advanced Bleach Mastery
Level up your artistry with portraits, glowing effects, realistic textures, and atmospheric scenes. These lessons give you the power to turn bleach into fine art.

Painting Portraits with Bleach
Portraits are one of the most rewarding (and challenging) bleach projects you can try. In this exercise, you’ll use diluted bleach to slowly build up soft shading, then finish with tiny pure-bleach highlights for lifelike details. It’s all about patience, layering, and learning to see light and shadow.

Painting Realistic Fur with Bleach
Fur looks chaotic, but there’s structure behind it—and this exercise will teach you how to capture it. Through layering and quick, vertical strokes, you’ll build up texture strand by strand until the fur looks soft and lifelike. It’s a patient process, but the results are magical.

Painting Spacey Backgrounds to Complement Your Bleach Art
Your background can make or break your design. In this exercise, you’ll practice creating layered, cosmic-inspired textures that push your main subject forward. With misting, smudging, and subtle layering, you’ll learn how to set the stage for your art to glow

Creating a Glow Effect with Layered Bleach Techniques
Learn how to make your designs shine—literally. By layering diluted bleach and using misting, smudging, and textured strokes, you can build a soft glow that radiates from your subject. Perfect for moons, stars, or anything you want to feel illuminated.

Mandala Practice—Bringing It All Together
This mandala project combines everything you’ve learned: fine lines, textures, shading, layering, and control. It’s less about symmetry and perfection, and more about practicing techniques in harmony. By the end, you’ll have a piece full of rhythm, detail, and your own style.
So - are you ready to finally get results?
If you're ready to get professional looking results from your bleach art, join the club today!
🖌Course Highlights
- 31 Tutorials + Exercises with videos, images, and infographics.
- Clear, step-by-step instructions—perfect for beginners and advanced artists alike.
- Lifetime access for just €22 (~$25)!
- Learn everything from safe handling to advanced artistic effects.
📖 Before You Join – A Friendly Heads-Up
I’m all about honest teaching—so here’s the deal: you’ll be reading a lot in this course.
Bleach painting isn’t just about moving a brush—it’s about understanding how the materials work, how to plan your designs, and how to avoid irreversible mistakes.
That’s why I’ve packed this course with concise, well-organized written lessons supported by pictures, bullet points, infographics and videos. I explain every technical term, so you’ll never feel lost. Every practical exercise also comes with a video of me painting, so you can watch the techniques in action.
But you will need to read carefully—because that’s where the gold is. No rambling, no filler, just compact, crystal-clear instructions that get you results.
💲 The Price? Just €22 (~$25) for all 31 tutorials.
That’s less than a cup of coffee for lifetime access to the ultimate bleach painting skillset.
🎨 Whether you’re here for the fun experiments, the professional techniques, or to master bleach painting from scratch—Bleach Painting Club will get you there.
