Step 1: Preparing Your Design
1.1. Creating Your Design: The first step in painting with bleach is to decide on the design you want to create. You can either draw your design by hand or create it digitally. If you’re working with a digital design, make sure to print it out on regular paper. If you prefer to draw by hand, use a dark marker to ensure the lines are clear and easy to trace. Simple designs, such as geometric shapes, silhouettes, or basic patterns, are great for beginners because they are easier to work with.
1.2. Transferring the Design: Once your design is ready, it’s time to transfer it onto your shirt. This step is crucial because it sets the foundation for your bleach painting. Here’s a simple and effective method to transfer your design:
-
Tracing with Semi-Transparent Paper: Take a sheet of semi-transparent paper, such as tracing paper or baking parchment. Place your printed or hand-drawn design underneath the semi-transparent paper. With a chalk or pastel pencil, carefully trace the lines of your design onto the semi-transparent paper. Make sure the lines are thick enough to be easily visible but not too heavy to avoid excessive chalk dust.
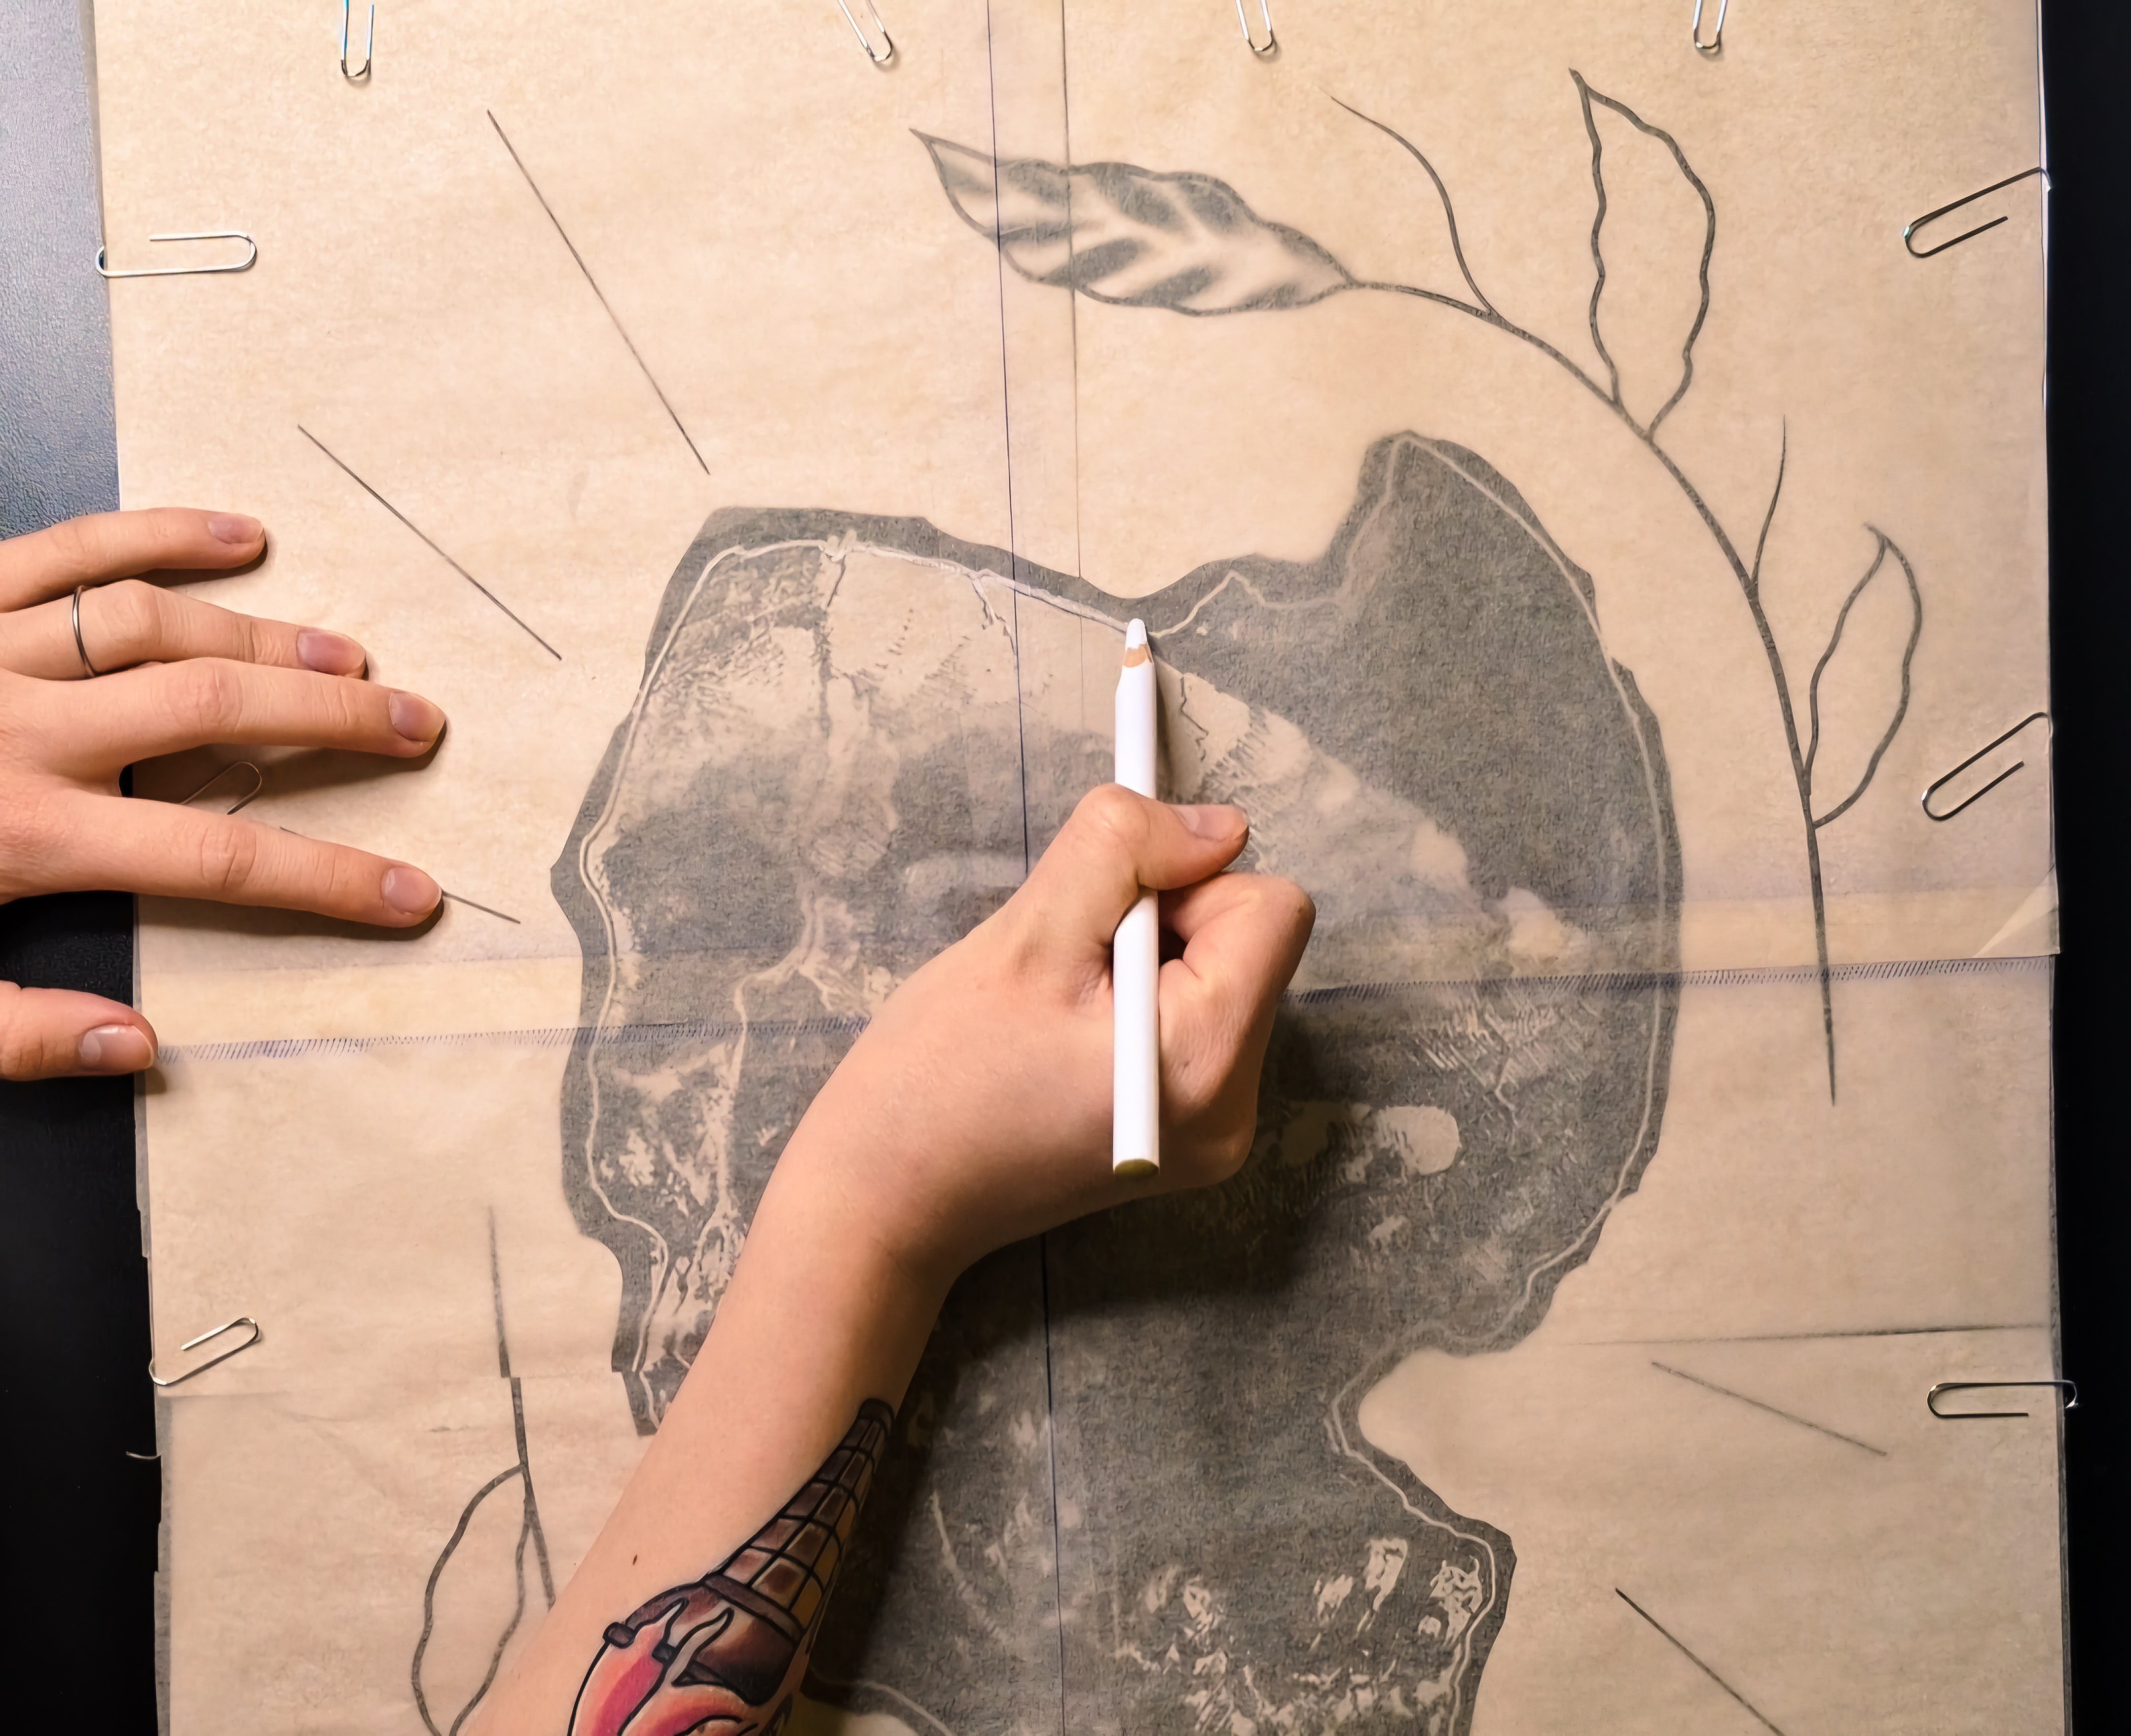
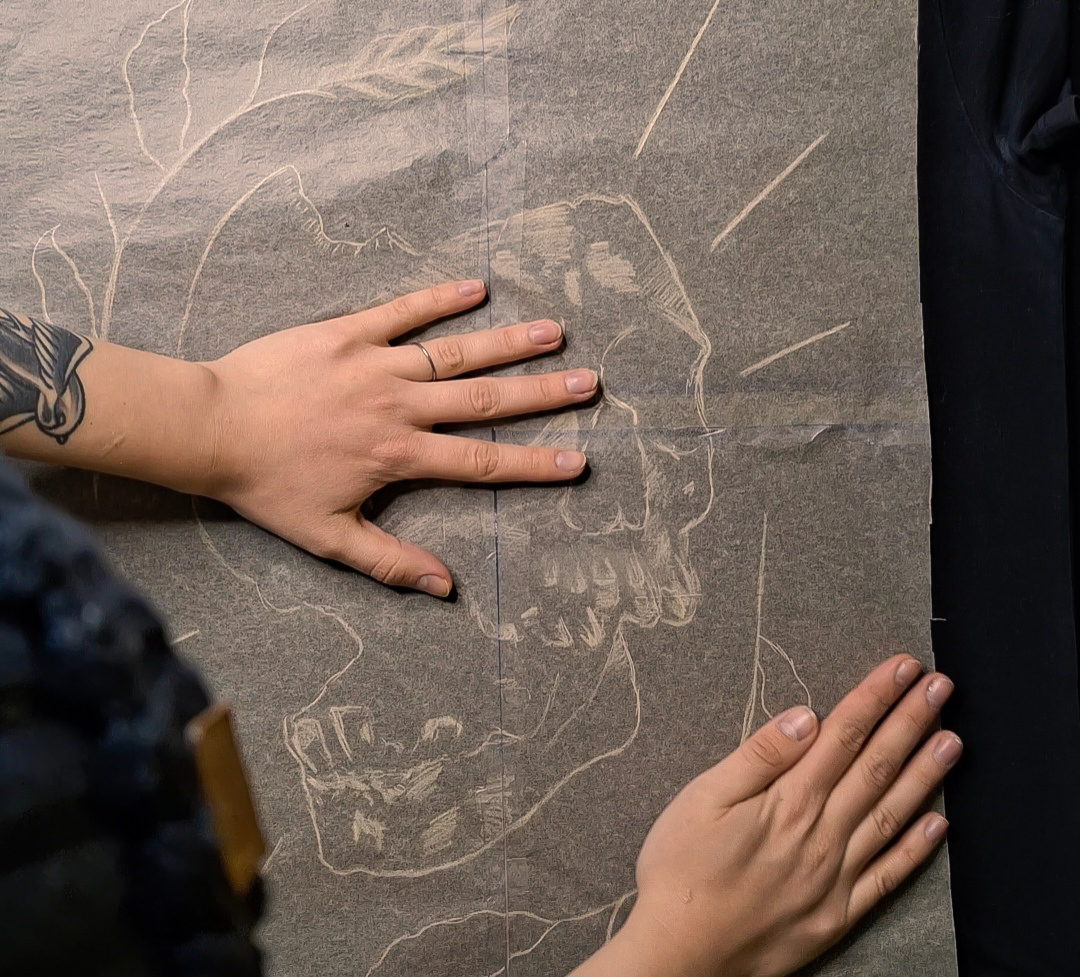
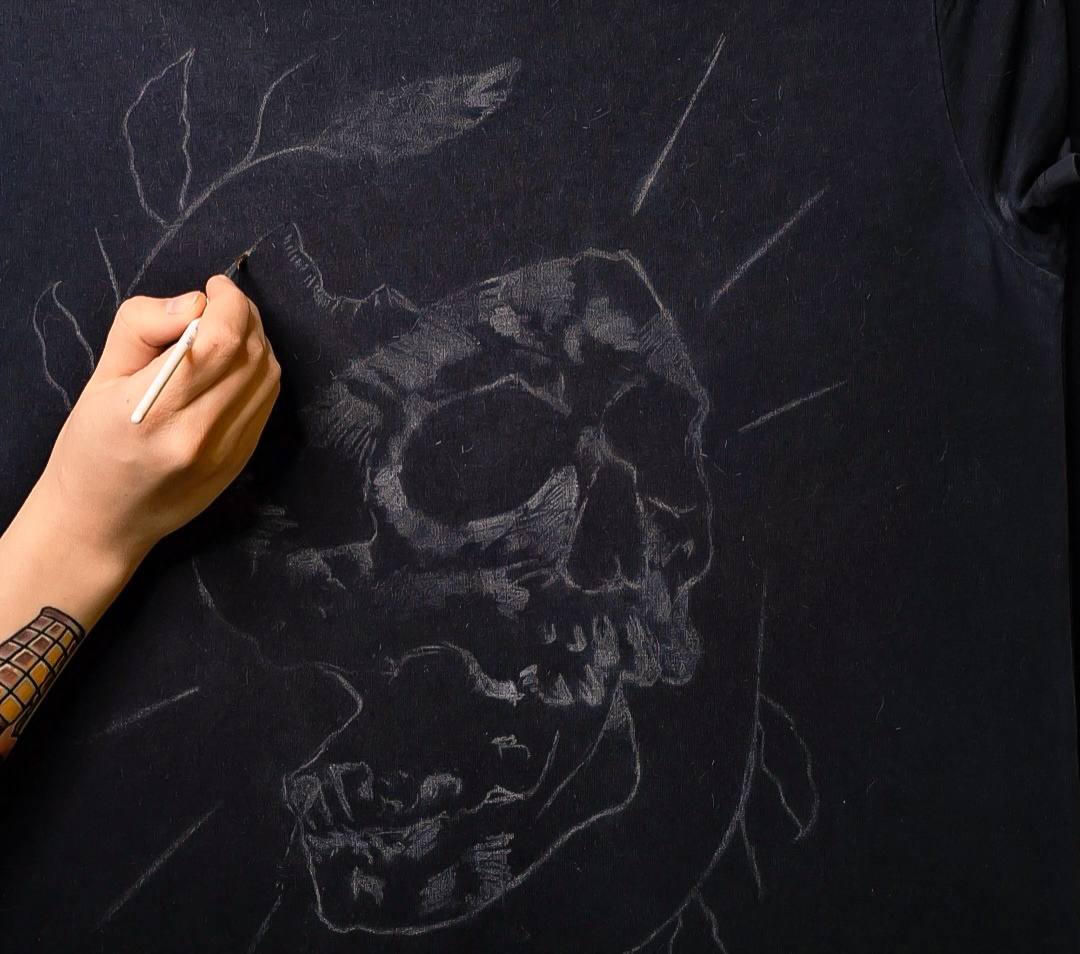
- Transferring the Design to the Shirt: After you’ve traced the entire design, it’s time to transfer it to the shirt. Before doing this, gently blow on the semi-transparent paper to remove any excess chalk dust. This helps prevent smudging when you transfer the design. Next, place the paper with the traced design face down onto the shirt, positioning it exactly where you want the design to appear. Press lightly on the back of the paper, making sure to press evenly across the entire design. When you lift the paper, the chalk outline of your design should be neatly transferred onto the fabric.
Pro Tip: If you’re concerned about smudging or chalk overload, you can lightly spray the back of the paper with hairspray before transferring it. This helps keep the chalk in place while you press it onto the shirt.
Step 2: The Painting Process
2.1. Setting Up Your Workspace: Before you start painting, it’s important to set up your workspace properly. Choose a well-ventilated area, preferably near a window or outside, as bleach fumes can be strong. Lay your shirt flat on a table and place a piece of cardboard or thick plastic inside the shirt. This will prevent the bleach from soaking through to the back of the shirt and protect your work surface.
2.2. Mixing and Applying Bleach: Now that your workspace is ready, it’s time to start painting with bleach. Here’s how to do it:
- Preparing the Bleach: Pour a small amount of bleach into a plastic container or bowl. You don’t need much bleach, so start with just a little, and you can always add more if needed. You can use regular household bleach, but be sure to wear gloves to protect your hands and avoid contact with your skin.
- Experimenting with Dilutions: To create different effects, you can experiment with different dilutions of bleach and water. For example, mixing bleach with a bit of water can produce lighter shades and softer gradients. Test different ratios on a scrap piece of fabric to see what works best for your design. This will allow you to achieve various effects, from subtle fades to bold contrasts.
-
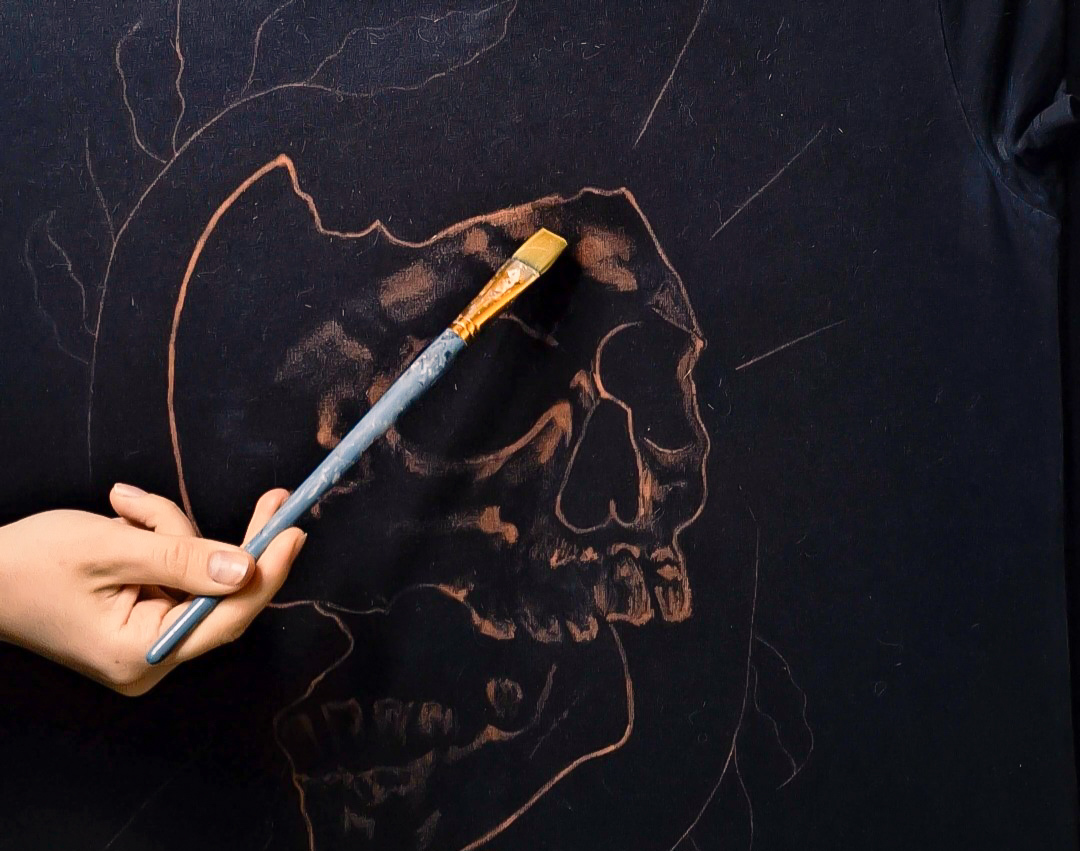
First Layer of Bleach: Dip a fine paintbrush into the bleach, removing any excess by wiping the brush on the edge of the container. Begin painting over the chalk outline of your design. It’s important to work slowly and carefully to stay within the lines of your design. Apply the bleach in thin, even layers. This helps prevent the bleach from spreading too much and ruining the design.
-
Building Up Layers: If you want your design to be more vibrant or have a more defined look, you can add additional layers of bleach. Let each layer dry for a few minutes before applying the next. However, if you’re using pure bleach, avoid going over the same area more than once or twice to prevent damage to the fabric. It’s best to dry the bleach with a hair dryer before applying a second layer. This helps avoid expanding lines, also known as blow-outs, which occur when the bleach spreads too much. Make sure that the first layer is completely dry before applying the second one to maintain the integrity of your design.
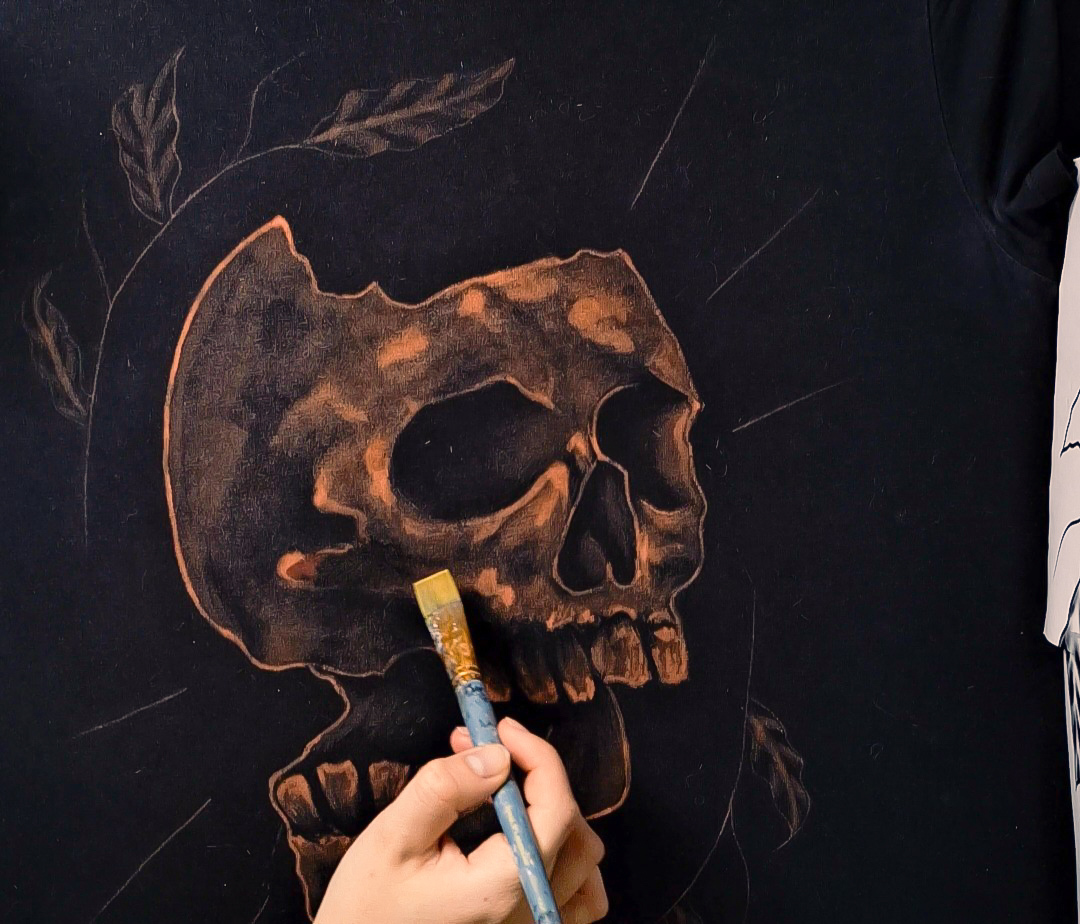
2.3. Taking Care of the Fabric: Bleach is a powerful chemical, so it’s important to be gentle with your fabric. Avoid scrubbing the bleach into the fabric or applying too much pressure with your brush. If the bleach starts to spread beyond the design, stop and let it dry before continuing. Always work with the fabric on a flat surface to ensure even application and prevent the bleach from pooling in certain areas.
Pro Tip: To add more depth to your design, try using a bleach pen for finer details or to create different shades by applying the bleach more heavily in some areas and lightly in others. This can give your design a more dynamic and artistic look.
Step 3: Rinsing and Finishing the Shirt
3.1. Rinsing the Bleach: After you’ve finished painting and the bleach has dried, it’s time to rinse the shirt. This step is important to stop the bleaching process and remove any residual bleach. Rinse the shirt under cold running water until the water runs clear. Make sure to rinse both the front and back of the shirt to ensure all the bleach is removed.
3.2. Soaking in Hydrogen Peroxide: Once rinsed, it’s a good idea to soak the shirt in a hydrogen peroxide solution. This neutralizes any remaining bleach and helps preserve the fabric. To do this, mix one part hydrogen peroxide with ten parts water in a basin or large bowl. Submerge the shirt in the solution and let it soak for about 10-15 minutes. This step is crucial for ensuring the longevity of your design and the fabric.
3.3. Washing and Drying: After soaking, wash the shirt in cold water with a mild detergent. This will remove any remaining chalk lines and ensure the bleach is completely rinsed out. After washing, it’s best to let the shirt air dry. Avoid using a dryer, as the heat can weaken the fabric, especially after bleaching.
Pro Tip: To keep your design looking bright and fresh, hand wash the shirt in cold water instead of using a washing machine. This will help preserve the fabric and the integrity of your design.
Tips and Tricks
- Test First: Before starting on your final shirt, it’s always a good idea to test the bleach on a scrap piece of fabric or an old shirt. This allows you to see how the bleach reacts with the fabric and gives you a chance to practice your technique.
- Create Stencils: If you’re worried about freehand painting or want to achieve precise shapes, you can create stencils from paper or plastic sheets. Place the stencil on the shirt and apply the bleach within the cut-out areas. This method is great for creating repeatable patterns or intricate designs.
- Experiment with Colors: Bleach doesn’t always turn fabric white. Depending on the color of the fabric, bleach can create different shades, such as orange, pink, or yellow. Experiment with different colored shirts to see what effects you can create.
- Use Bleach Pens: For more detailed work, you can use bleach pens. These pens allow for finer lines and can be great for adding small details or writing text on your design. They also give you more control over the amount of bleach you’re applying.
Conclusion
Painting with bleach on clothes is a creative and satisfying way to customize your wardrobe. By following the steps and tips outlined in this guide, you can create beautiful, one-of-a-kind designs that are sure to stand out. Remember to take your time, work carefully, and have fun with the process. With practice, you’ll be able to create stunning bleach-painted garments that reflect your personal style.
Happy painting!
P.S. You can find some shirts that I've painted with bleach in the shop section of this page :)

⚠ Safety First: Bleach Painting Precautions
Bleach is a strong chemical and should be handled with care. Always wear gloves to protect your skin and a mask to avoid inhaling fumes. Work in a well-ventilated area or outdoors to minimize exposure. Avoid contact with your eyes and clothing, and never mix bleach with other cleaning products, as this can create harmful gases. After painting, safely store or dispose of any leftover bleach and wash your hands thoroughly. Stay safe and enjoy your creative process!

